Adding Zones and Containers
Picking up where we left off — you've created your account and added your first Location. Now let's fill it in.
Step 5: Add a Zone
A Zone is a smaller area within a Location — think "Closet", "Garage Shelving", or "Kitchen Pantry". A Zone can also be a corner of a room, a wall, an item itself that contains other items. Zones can even nest inside other Zones if you want to get really granular (a "Top Shelf" zone inside your "Closet" zone, for example).
From your Location's detail page, tap the + button in the bottom corner. It'll expand into a small menu of colored options.
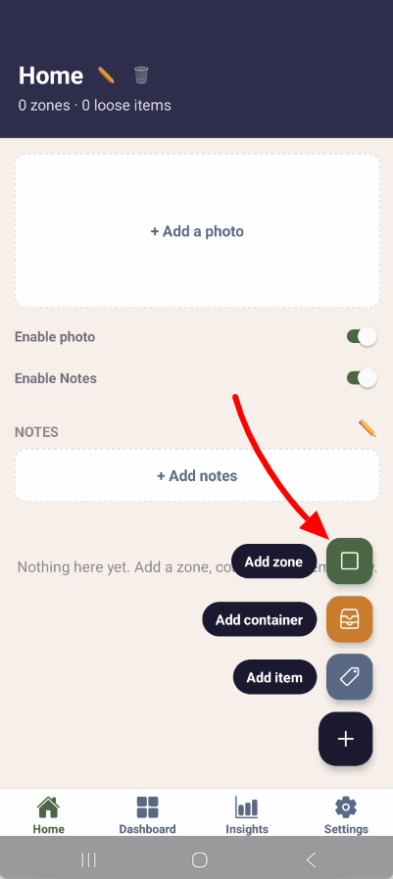
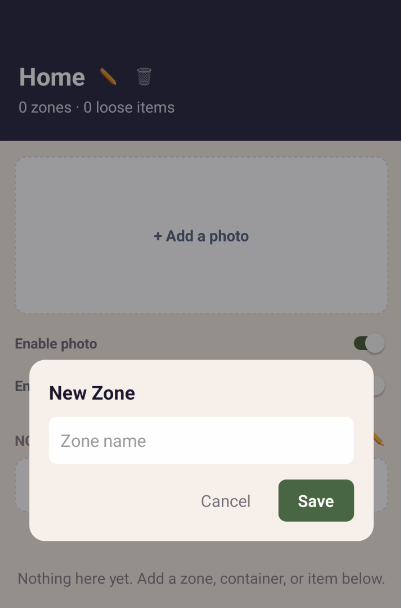
Tap "Add zone." Give it a name and save.
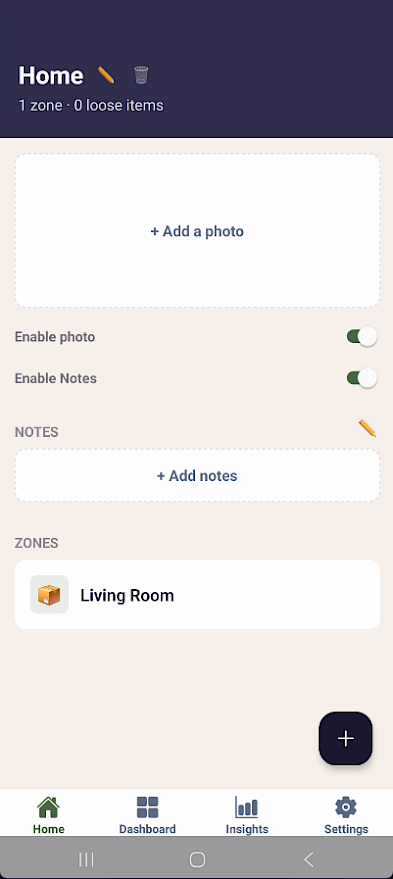
You'll now see your Zone listed under that Location, and tapping into it brings you to its own detail page — ready for Containers.
Zone Detail Screen and Zone Controls
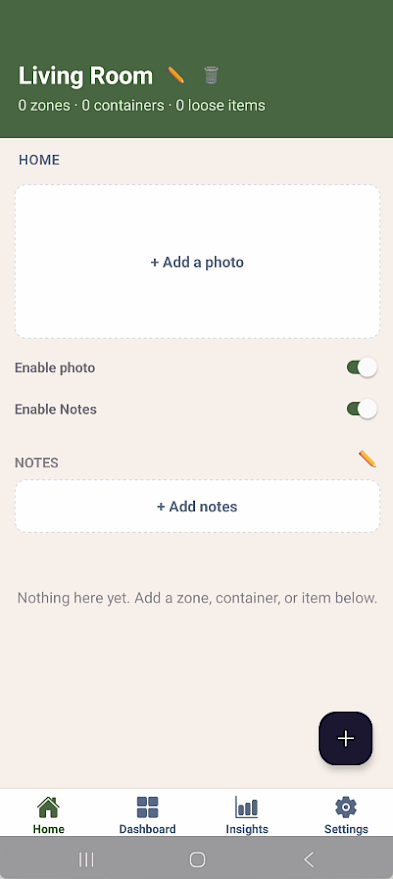
Just like the 'Location Controls', the Zone details screen contains the same set of controls to adjust what you see.
- The Pencil icon allows you to rename your Location.
- The Trash icon deletes the Location.
- Enable photo
- Enable Notes
'Enable photo' and 'Enable Notes' is defaulted to on. If your Location doesn't need an image, just slide the toggle to off and the photo area will be minimized. The Same goes for the Notes.
Step 6: Add a Container
A Container is the actual bin, box, drawer, or shelf where your stuff physically sits. Containers can live inside a Zone, or — if you don't need that extra layer of organization — directly under a Location.
From your Zone's detail page, tap the + button again and choose "Add container."
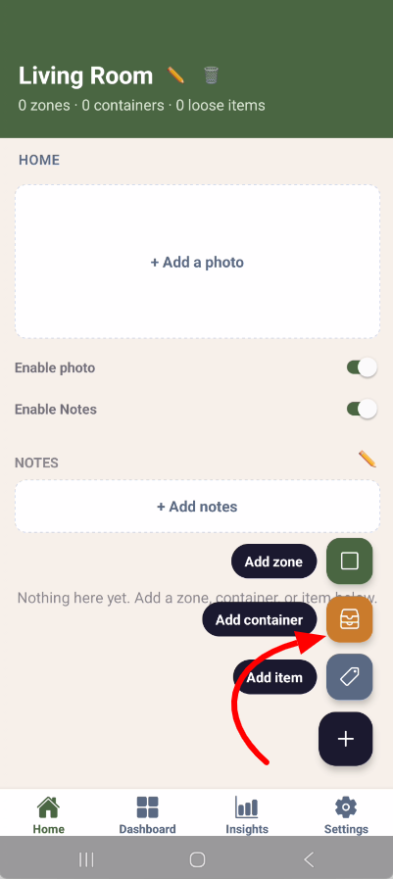
Name it something specific, like "Blue Storage Bin" or "Top Drawer," and save.
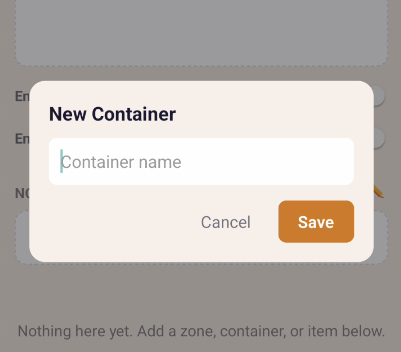
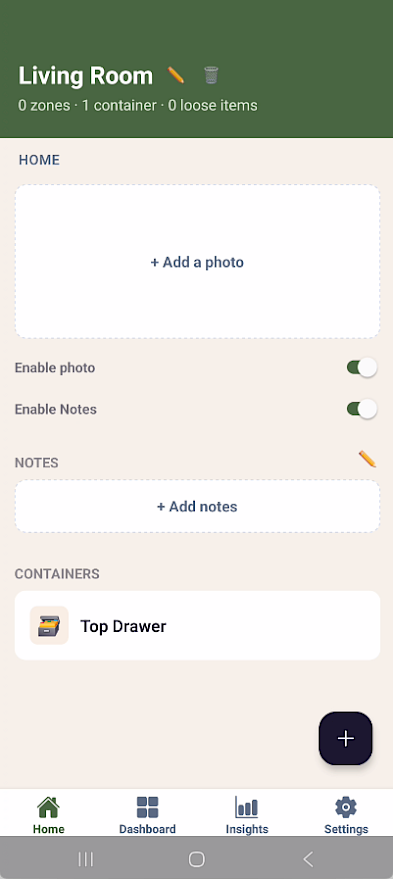
Once saved, your first Container has been added! Now you'll see your new Container in the 'Zone' screen. You can now select your Container to access the Container's detail page.
Container View and Container Controls
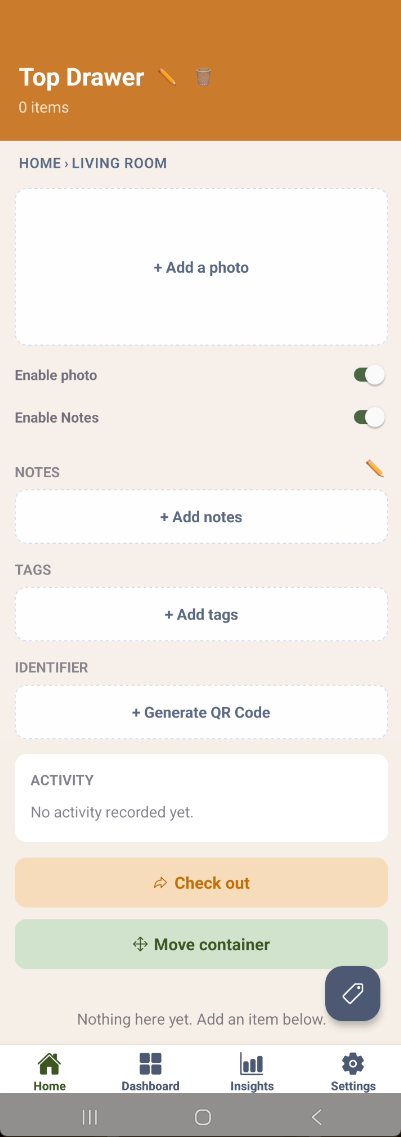
The Container has it owns set of controls in addition to the common controls found in the Location and the Zone detail screens.
- first
- second
- third